

Batch watermark Word documents
An illustrated guide to watermarking up to 15 DOC and DOCX files with shared text or logo settings, individual passwords, live results, cancellation and single-file retries.
Use the batch watermark tool when several Word files need the same text or logo. Upload the documents, choose one watermark and start conversion. Each completed file appears in a separate results panel, so you can download it while the remaining files are still processing.
This guide follows the current interface with screenshots from real uploads and a successful three-document conversion. To practice, use the public sample document. Keep an original copy of your own documents before processing them.
Choose the right workspace
| Requirement | Use |
|---|---|
| One shared DRAFT, CONFIDENTIAL or logo watermark across up to 15 documents | Batch watermark |
| Several watermarks on each document, custom placement, repeated patterns or header/footer scope | Main watermark editor, with up to five documents and five saved configurations |
| Inspect the actual page layout while editing, or revise document content | A document editor such as desktop Microsoft Word |
The batch page uses one Standard watermark. It does not have the homepage's Add watermark and Ready to convert configuration workflow. Changes in the batch settings are used directly when you select Convert files.
File types and limits
| Item | Current support |
|---|---|
| Documents | DOC and DOCX; both can appear in the same batch |
| Number of documents | Up to 15 in the file list |
| Document size | Up to 5 MiB per file |
| Watermark image | PNG, JPEG or WebP, up to 5 MiB |
| Watermarks per batch | One shared text watermark or one shared image watermark |
| Downloads | A separate Word result for each successful file; no combined ZIP download |
PDF, presentation, spreadsheet and image files cannot be used as the input documents here. The image upload inside Image watermark is for the logo applied to your Word files. Changing a filename extension does not convert its format.
1. Upload and check the file list
Open the batch page and select Choose Word files or drop them here. Select multiple DOC/DOCX files in the file picker, or drag them from your file manager onto the upload area. Add further files through the same area until the list reaches its limit.
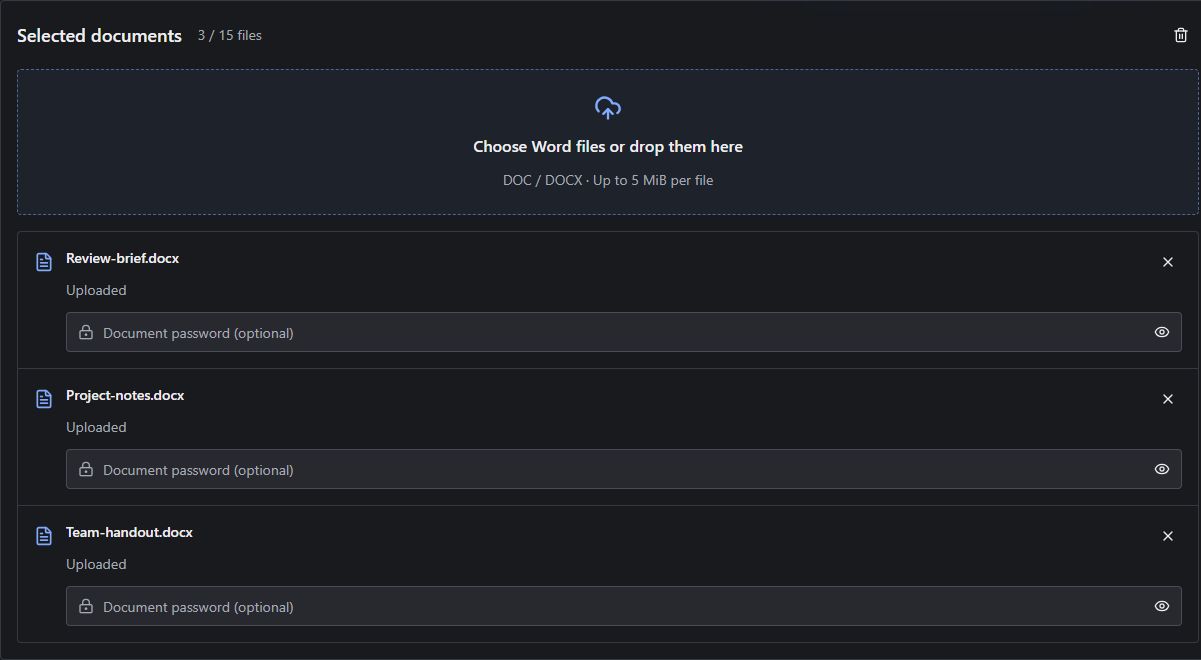
Wait for every document to show Uploaded. This means the input is ready for conversion; it does not mean a watermarked copy has been created. A failed upload has its own retry action. Remove a file with its row's cross button, or clear the list with the trash icon above it.
On a phone, the upload rows stack vertically. With a longer list, scroll inside the file list to reach later records. The conversion controls remain separate from the list.
Enter opening passwords on the matching files
Each file has a Document password (optional) field. Enter the password that opens that document in Word; leave it empty for an unencrypted document. Use the eye icon to reveal or hide your entry while checking it. A password belongs to its own upload record, even if another uploaded file has the same filename.
The browser may warn that a document is encrypted. This detection is advisory: no warning does not prove that a file has no password. You may enter a password regardless of whether a warning appears. A missing password warning does not block conversion, but an encrypted document still needs the correct opening password to be processed successfully.
If you do not know that password, request it from the document owner. The tool does not remove or bypass encryption. Do not assume the converted copy retains the original document's password protection.
2. Set up a shared text watermark
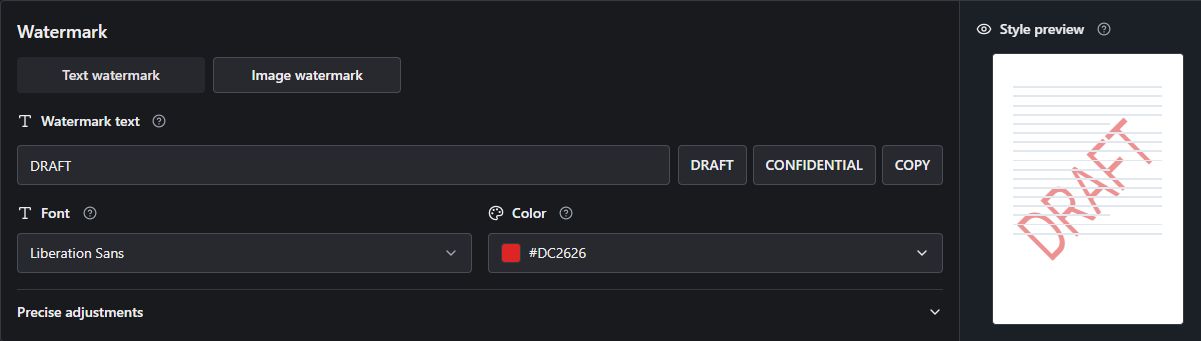
Choose Text watermark. Type the wording in Watermark text, or select DRAFT, CONFIDENTIAL or COPY to fill the field. These shortcuts change the text; they do not start conversion. Standard text accepts up to 200 characters, but a short label is usually easier to read on the page.
Font and color
Open Font and search for a typeface instead of scrolling through the full list. The choices correspond to fonts available to the conversion service. A recipient's editor may still render a document differently, so inspect the downloaded file in the software used for sharing.
Open Color to select a preset or use the color picker. The default red is #DC2626. For example, keep red for a visible DRAFT label, or choose gray for a quieter mark. Judge legibility against tables, charts and body text in the actual result, not only the sample preview.
Font size, layout and semitransparency
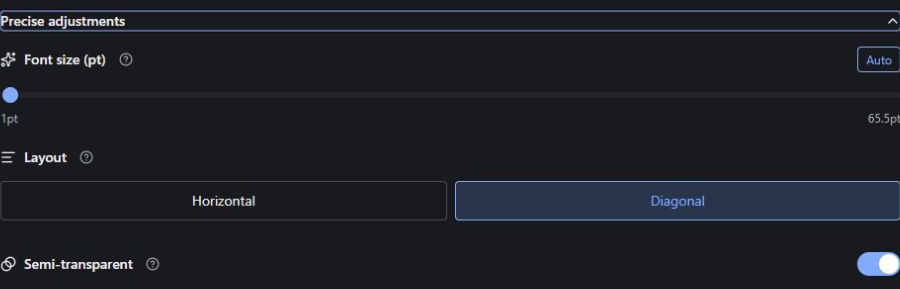
Expand Precise adjustments to reveal the less frequently changed controls.
| Control | How to use it |
|---|---|
| Font size (pt) | Auto lets the converter choose the Standard watermark size. Turn Auto off to use a specific point size; drag the slider or edit the numeric value. The visible slider covers 1–65.5 pt. |
| Layout | Choose Horizontal for a straight label or Diagonal for an angled mark. The batch Standard mode does not offer a free rotation angle or vertical layout. |
| Semi-transparent | Keep it enabled for a lighter mark behind the content. Turn it off for a stronger mark. This is an on/off choice, not a percentage opacity control. |
For a first DRAFT example, select Liberation Sans, red #DC2626, Auto, Diagonal and Semi-transparent. These are the initial appearance defaults; you still need to enter or select the watermark wording.
3. Use a logo instead of text
Choose Image watermark, then drop a PNG, JPEG or WebP into the image upload area. This is a separate upload from your Word documents. Wait for the logo to show Uploaded before converting. Its thumbnail helps you confirm that you chose the right image; Replace image selects a different one.
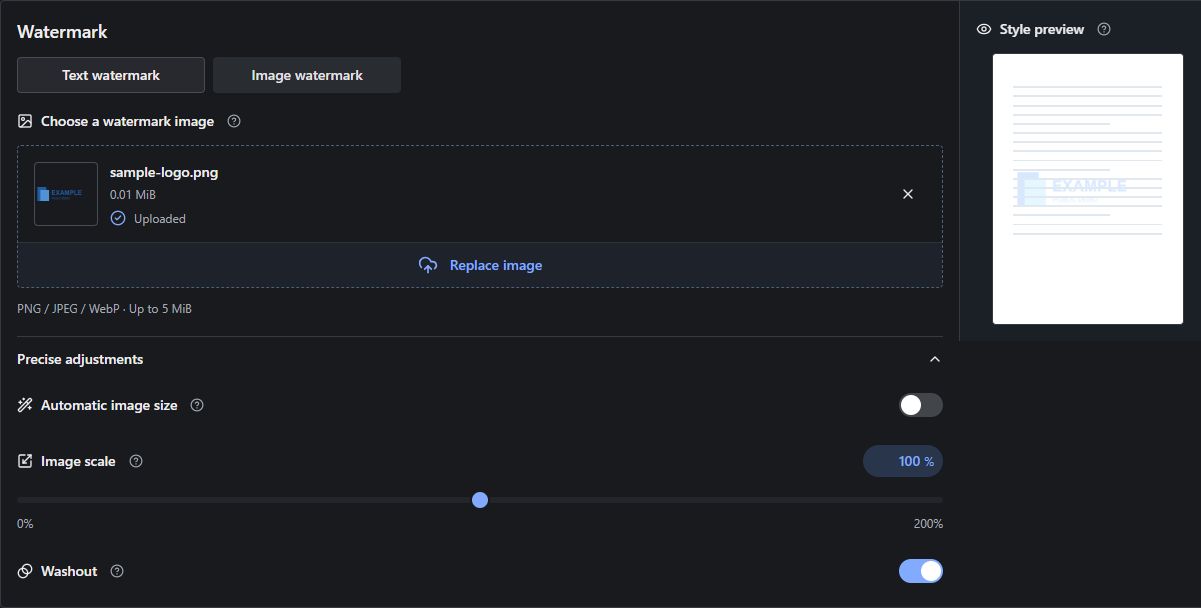
Expand Precise adjustments for these controls:
| Control | What changes |
|---|---|
| Automatic image size | Enabled by default. The converter chooses a size for the centered Standard picture watermark. |
| Image scale | Appears when automatic sizing is off. Adjust the percentage with the slider or number field; 100% uses the image's original scale. Image pixel dimensions and resolution affect its physical size in the document. |
| Washout | Enabled by default. Lightens the image so document text is easier to read. Turn it off when a pale logo becomes too faint. |
Use an image with a transparent background when you want the logo without a surrounding rectangular background. You can download our public demonstration logo to try the workflow. Batch mode has no cropping, tiling, position or arbitrary opacity controls; use the main image watermark editor for those options.

Text and image are alternatives in this workspace. To apply a label and a logo together, use the main editor and save both configurations.
4. Understand Style preview
The adjacent Style preview updates as you change the shared settings. It illustrates the watermark on a sample page. It does not read your uploaded documents, their page counts, section structure, fonts, images or page breaks.
The same settings may look different on a narrow portrait page and a wide landscape page. Auto sizing can also produce different physical sizes across documents. Convert a representative document first if precise appearance matters, then review the Word output before processing the rest.
Compare with real output
These images were rendered from actual converted sample Word documents. Download the files to inspect them in your own editor.
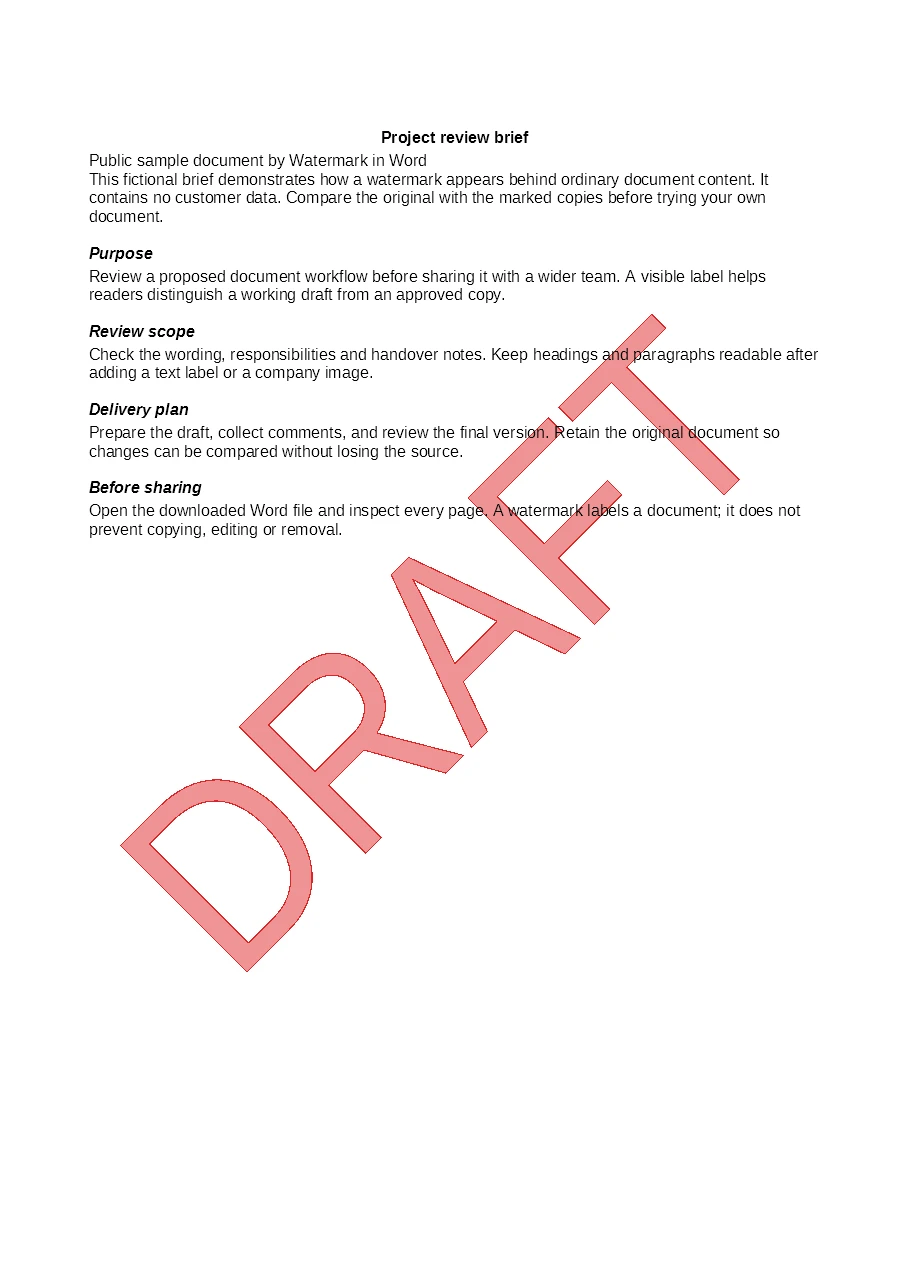
Download the DRAFT Word example. This demonstrates a shared review label, rather than a screenshot of Style preview.
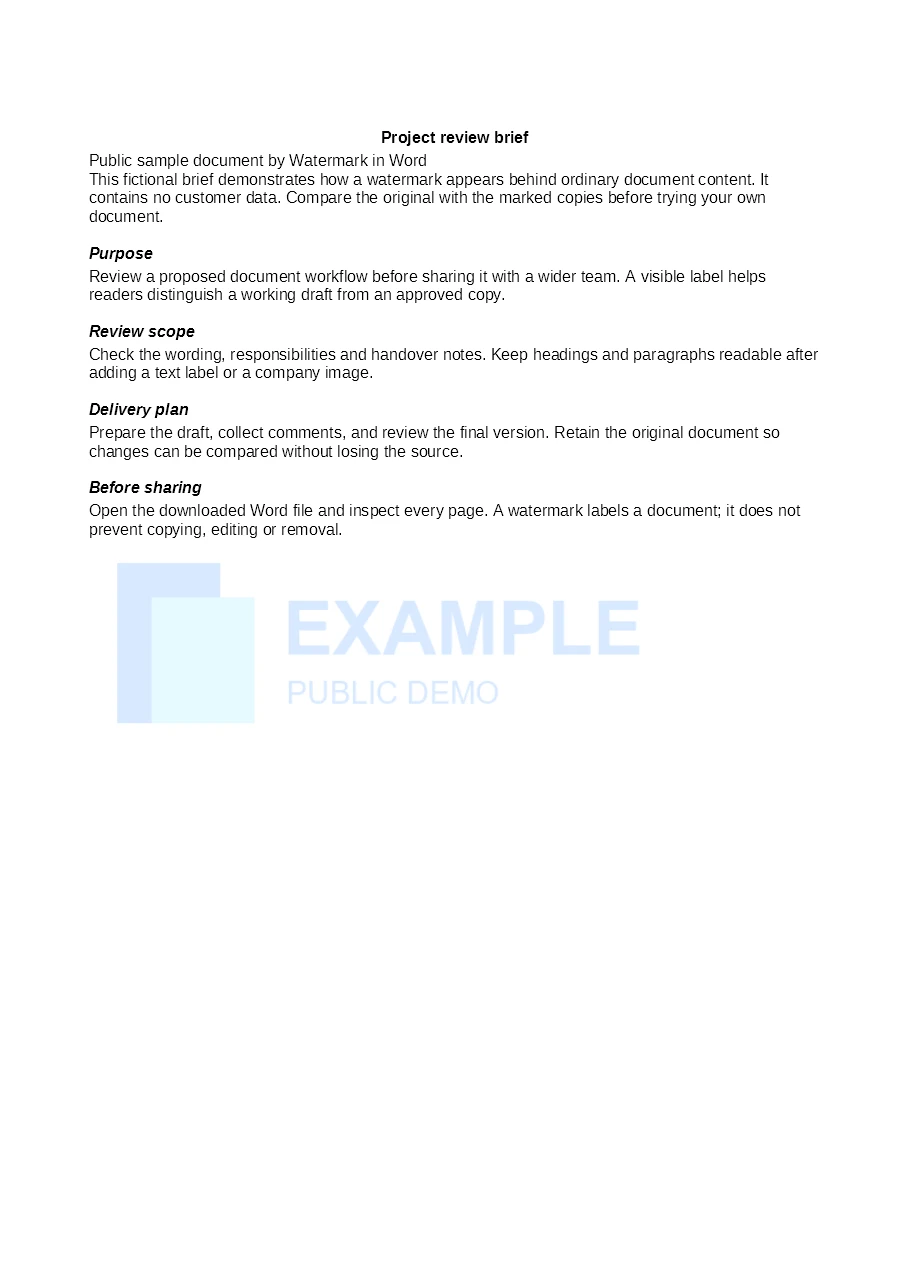
Download the logo Word example. Compare the mark against the document's body text and headings. A visible watermark communicates status or identity; it does not prevent editing or copying.
5. Convert and follow individual results
Select Convert files after all uploads are complete and the watermark is valid. A text watermark needs nonempty text; an image watermark needs a successfully uploaded image. While conversion runs, file and watermark editing is disabled to keep that run's inputs consistent.
The separate Conversion results panel shows each file as queued, converting, successful or failed. A completed file gets its own Download link immediately; you do not have to wait for the last file to finish.
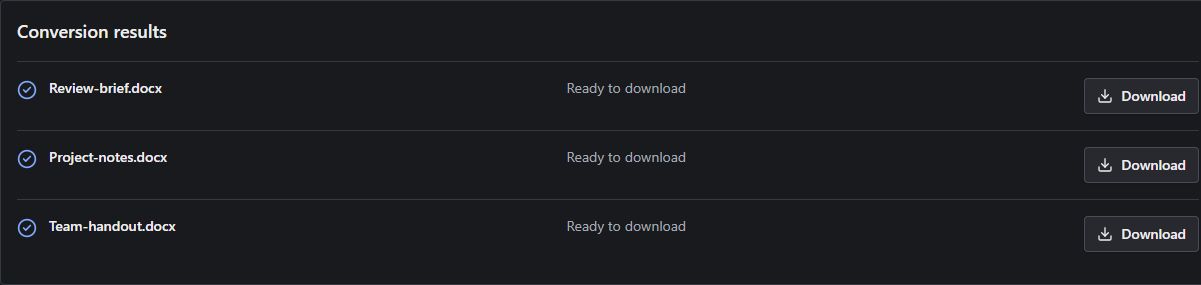
The screenshot shows three public sample documents converted with the same DRAFT configuration. Result order corresponds to the uploaded records, not to a merged output document. Download each required file and open it to check text, tables, images, first pages and later sections.
If a verification box appears
The homepage and batch tool share the same conversion allowance. The first three submissions do not require verification; further submissions require a security check. A whole batch counts as one submission, and a single-file retry also counts as one. The allowance resets after one hour without conversion requests.
Complete the check beside the conversion controls, then start conversion or select the file's retry action. A check may need to be repeated if its credential expires or verification fails. That event does not clear the files, settings or results already displayed. Refreshing the page does not reset the verification requirement.
Do not refresh to solve a verification problem: the working file list, settings and results are held in the current page session. A page refresh can clear that workspace even though the server still requires verification.
6. Cancel or recover from a failed file
Choose the red Cancel conversion button to stop the active batch. Results already received remain available; unfinished items can be marked canceled. Closing or leaving the page also terminates the active request, so do not expect the batch to keep running in the background.
Wait until the batch has stopped before retrying an individual file. Retry controls are disabled during a running batch, including while another retry is active.
| Result or symptom | Next step |
|---|---|
| Missing or incorrect password | Select Edit password on that result to return to the matching upload field. Enter the correct opening password, then use that file's retry action. |
| Unreadable or damaged document | Open the original in Word. Repair it or save a fresh DOC/DOCX copy and upload that copy. Repeating an unchanged damaged input is unlikely to help. |
| Unsupported format | Export a real DOC or DOCX from the original application; do not just rename the extension. |
| Timeout or interrupted conversion | Keep successful downloads. After the run ends, retry the affected item when a retry button is offered. A complex document may need simplifying before another attempt. |
| The problem keeps happening | Use Send feedback on the failed result. It opens the feedback page separately so you can keep the batch workspace open. Describe the symptom without including a document password. |
A single-file retry uses the watermark settings captured for that run and the file's current password. Editing the visible watermark controls after a run does not change the retry's design. To apply a different design to the whole list, start a new conversion instead. Successful results for other files are unaffected by a single-file retry.
7. Start another batch and keep your downloads
A new accepted conversion replaces the displayed results for the current list. If verification rejects the request before conversion starts, the previous results remain. Download copies you want to keep before starting a different design.
Removing a document from the batch list also removes its result from this page's displayed results. Clearing the list removes all those records. Save your downloads before removing files or refreshing the page.
Files are uploaded for server processing; this is not a browser-only converter. Routine uploads, watermark images and outputs use random storage names and are temporary, normally cleaned up about two to three hours after upload, with possible delays. Keep download links private and review the Privacy Policy before submitting documents that have special handling requirements.
Related guides
- Choosing a batch watermark workflow: online tools, desktop Word and automation compared.
- Full watermark settings reference: the broader controls available in the main editor.
- Troubleshooting: password, format and output checks.
- Open the batch tool to apply one style to your document set.